


Uploading Data via TCP
-
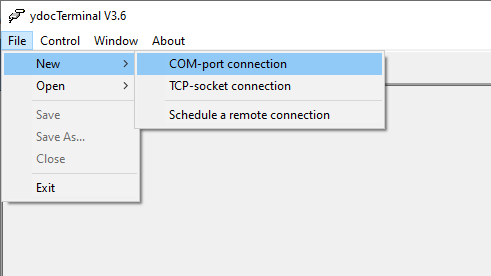
In order to open a connection to a YDOC data logger via USB, first open the YDOC Terminal
program, and create a new COM-port connection:
-
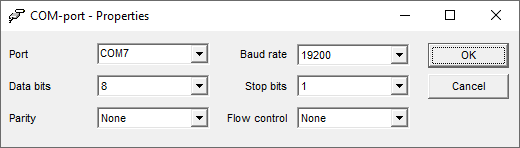
Select the desired COM Port settings, you should only need to change the COM Port to the correct port and leave the other settings unchanged. Then click the 'OK' button.
-
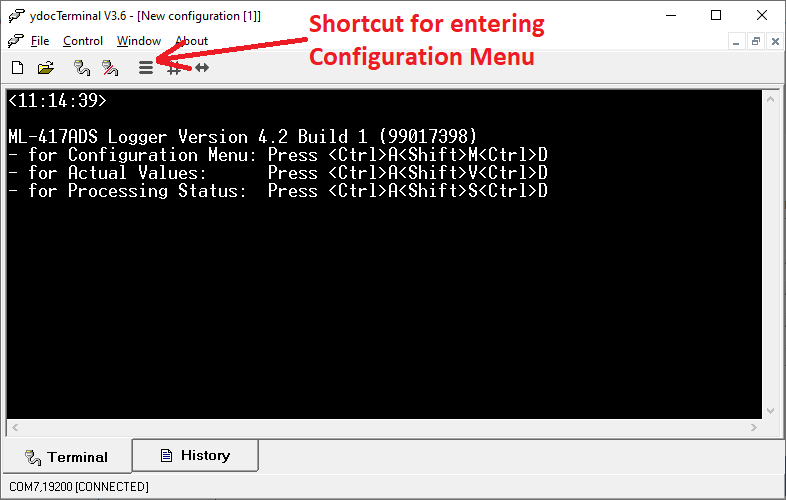
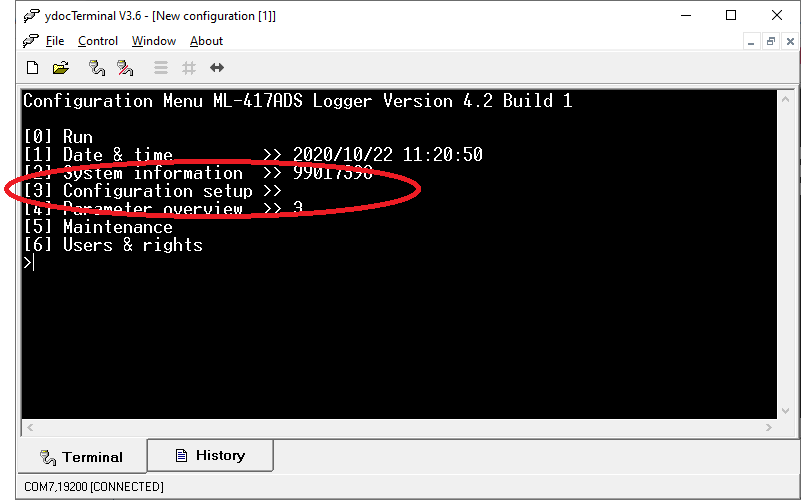
If the correct COM Port has been selected, you should now be connected to the YDOC over USB. Click on the button with the three bars to enter the Configuration Menu.
-
Press '3' to enter the Configuration setup.
-
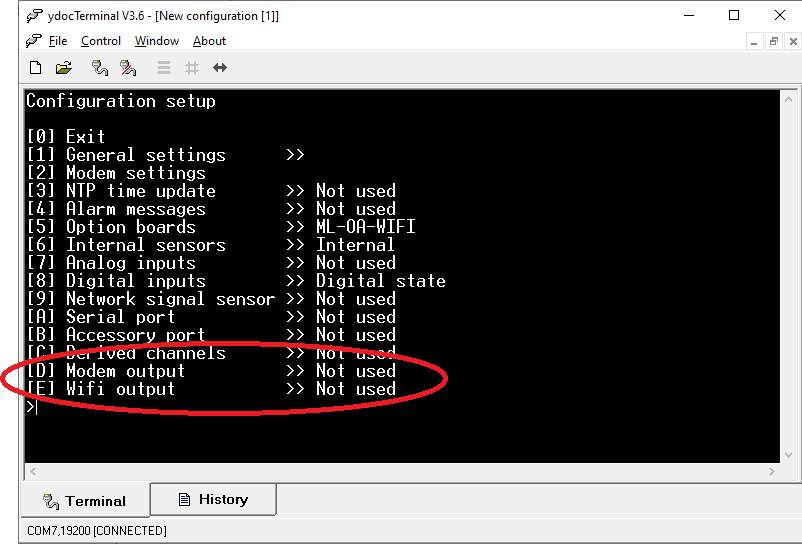
Press either 'D' or 'E' to enter the Modem output or Wifi output settings respectively. A Wifi add-on board is required for Wifi.
-
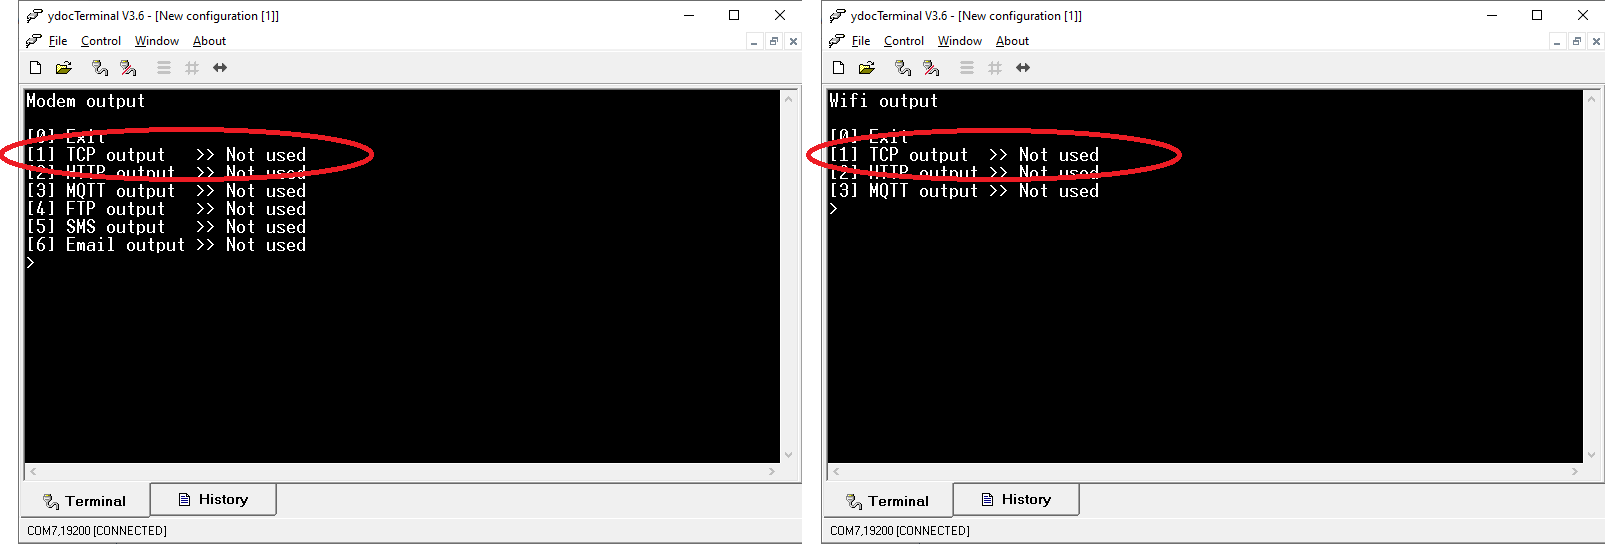
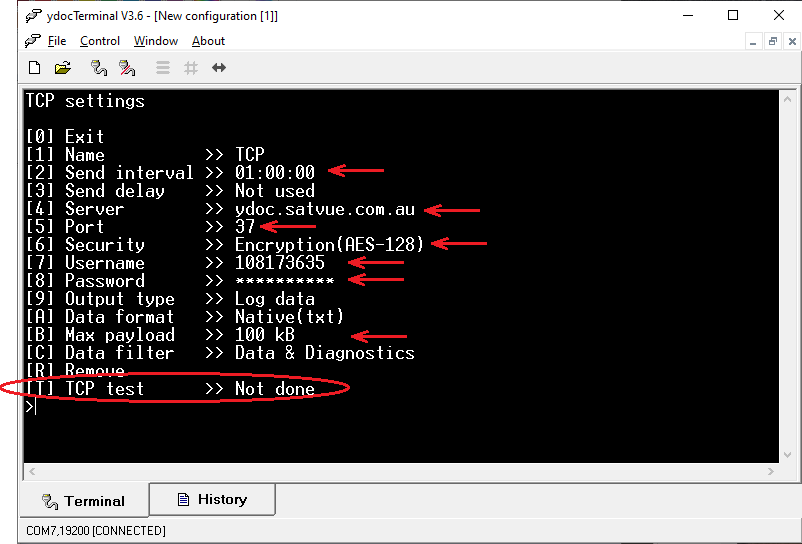
Press '1' to enter the TCP Output settings.
-
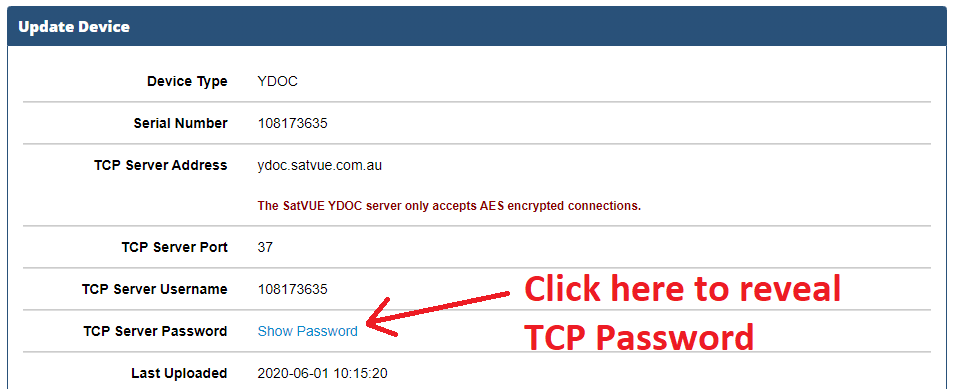
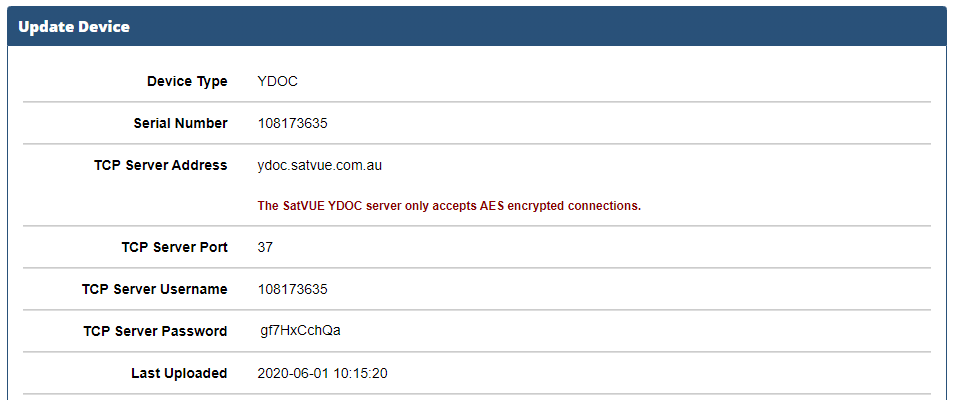
In the SatVUE portal, navigate the Device Edit page, and un-hide the TCP Password.
-
Copy the TCP authentication details from the SatVUE portal into the YDOC's TCP Settings. Then press 'T' to run a TCP test.
You must use AES-128 Encryption, the SatVUE TCP server does not accept un-encrypted connections.
You should set the Max payload to 100KB to avoid issues in low signal areas, with a payloads that are too large to successfully upload.
-
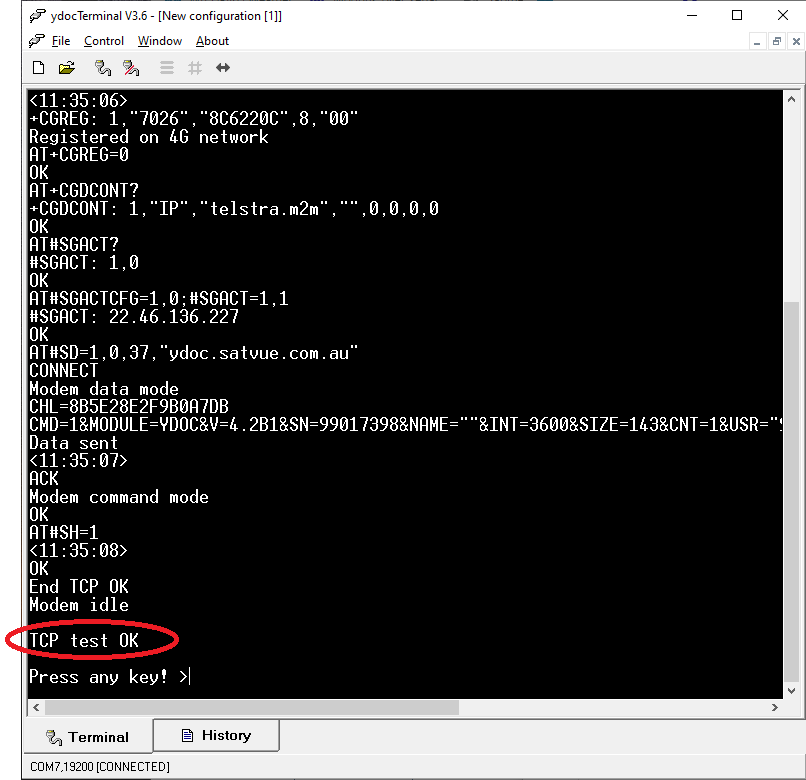
Ensure the TCP upload test is successful, you shoudl see the TCP test OK message on the screen.